

C.Y. | Colin Yun
CATEGORY
Environment: Medieval
INTRODUCTION
Example text. Click here to add your own content and make changes to the font. This is a great place to showcase your environmental art concepts and let your audience know more about your unique style and vision.
STYLE
Semi-Realism
PROGRAMS USED
Maya, Unreal Engine, Zbrush, Substance Painter, etc.


Breakdown
Start Of Project

REFERENCES
1) Gathered many different art pieces from Artstation/Pinterest.
a) This was to get inspiration to come up with my own composition.
2) Also gathered information on the different assets that can be used in my pieces
a) Includes different props and sizing of the modularity pieces to build a sense of scale
2D - 3D
BLOCKOUT STAGE
1) Opened up Photoshop to start creating my own composition using my own perspective guidelines.
2) Quick and dirty depth pass painted in to get sense of scale
3) Moved over to Maya and started to blockout the scene.
a) Blocked out out different compositions based on the original photoshop sketch
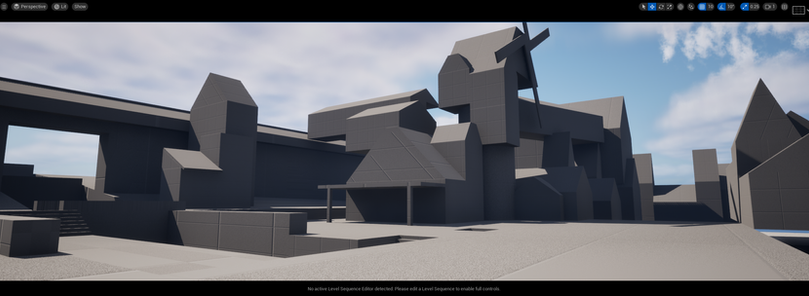
4) After the rough blockout is set in maya, I imported the blockout into Unreal.
a) The next important step was to get the base landscape sculpt set in motion as it was used for the foreground element

Photoshop Sketch

Maya Blockout V01

Maya Blockout V02
Asset Creation
MODELING STAGE
1) Once the blockout was set in stone, I was able to create the modular kit for my buildings (main focal point of the entire composition)
2) The tudor and architectural design were something I had to get reference for.
3) The most important part of this stage I focused on was the correct sizing of each modularity piece.
a) Sizing Order Imporatance: Walls --> Roofing --> Trims --> Corners/Pillars --> Extras
4) After the main building parts were finished, I was able to model out the more detailed portions of the building.
a) Cantilevers, Smaller Trims, etc.


SCULPTING STAGE
1) Since I knew every one of these trims were sharing the same modular kit, I was able to focus on sculpting out the trimsheets.
TEXTURING STAGE
1) Went into substance painter for the texturing process
2) Had simple material set ups for the trimsheet and was able to have different variations if I wanted to.
Detailing
UNREAL STAGE
1) All that's left is to import the models and place the textures onto the models
2) Afterwards, I replaced the blockout with all the assets.


DETAIL STAGE
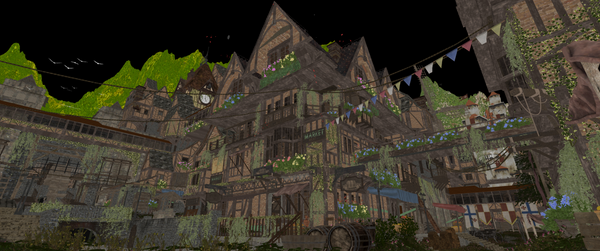
1) Since everything is now set in place, the first thing I focused on was the landscape foliage.
a) This helped bring the foreground elements together as the landscape material blend and instanced foliage helped bring the environment to look more cohesive.
2) Story elements
a) I started to think about what could be found within a street of a medieval city and what the civilians would be up to.
b) Adding in market stands, food, lamps, barrels, wagons, construction, tools... A lot can be expressed within this town.
c) The foliage on the buildings helped give the environment a sense of abandonment due to foliage growing on the buildings.
d) This is in fact, the opposite as the foliage were all kept in a nice condition as if people were tending to the plants, making everything look vibrant.
3) Finally, the lighting and post process stage are left before getting the renders out
a) I used UltraDynamicSky as it contained many different controls for lighting and included all the controls for volumetrics as well
b) I used multiple post process volumes as a means to utilize camera exposure only and up the intensity of lighting as well as giving a soft warmer tone to the overall look.
Rendering
RENDERING SETUP
1) I wanted to color grade in After Effects and Photoshop and to effectively rendering my sequences out with the correct color settings I had to setup:
a) OCIO Display in Unreal
b) Movie Render Queue Settings

OpenColor IO Settings

Render Queue Settings

Albedo
Roughness
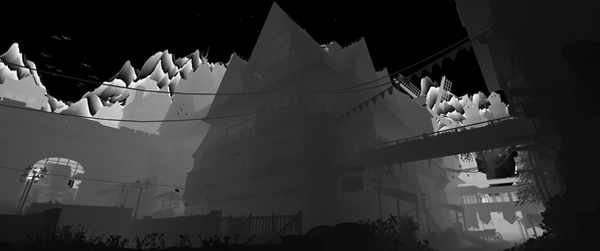


Depth
Raw Render

Detailed Lighting
Post